Updated on: 11 Apr 2025
By: Admin
Data Management allow user to upload the updated data collecting, organizing, and maintaining data to ensure its accuracy, security, and accessibility for decision-making and operations.
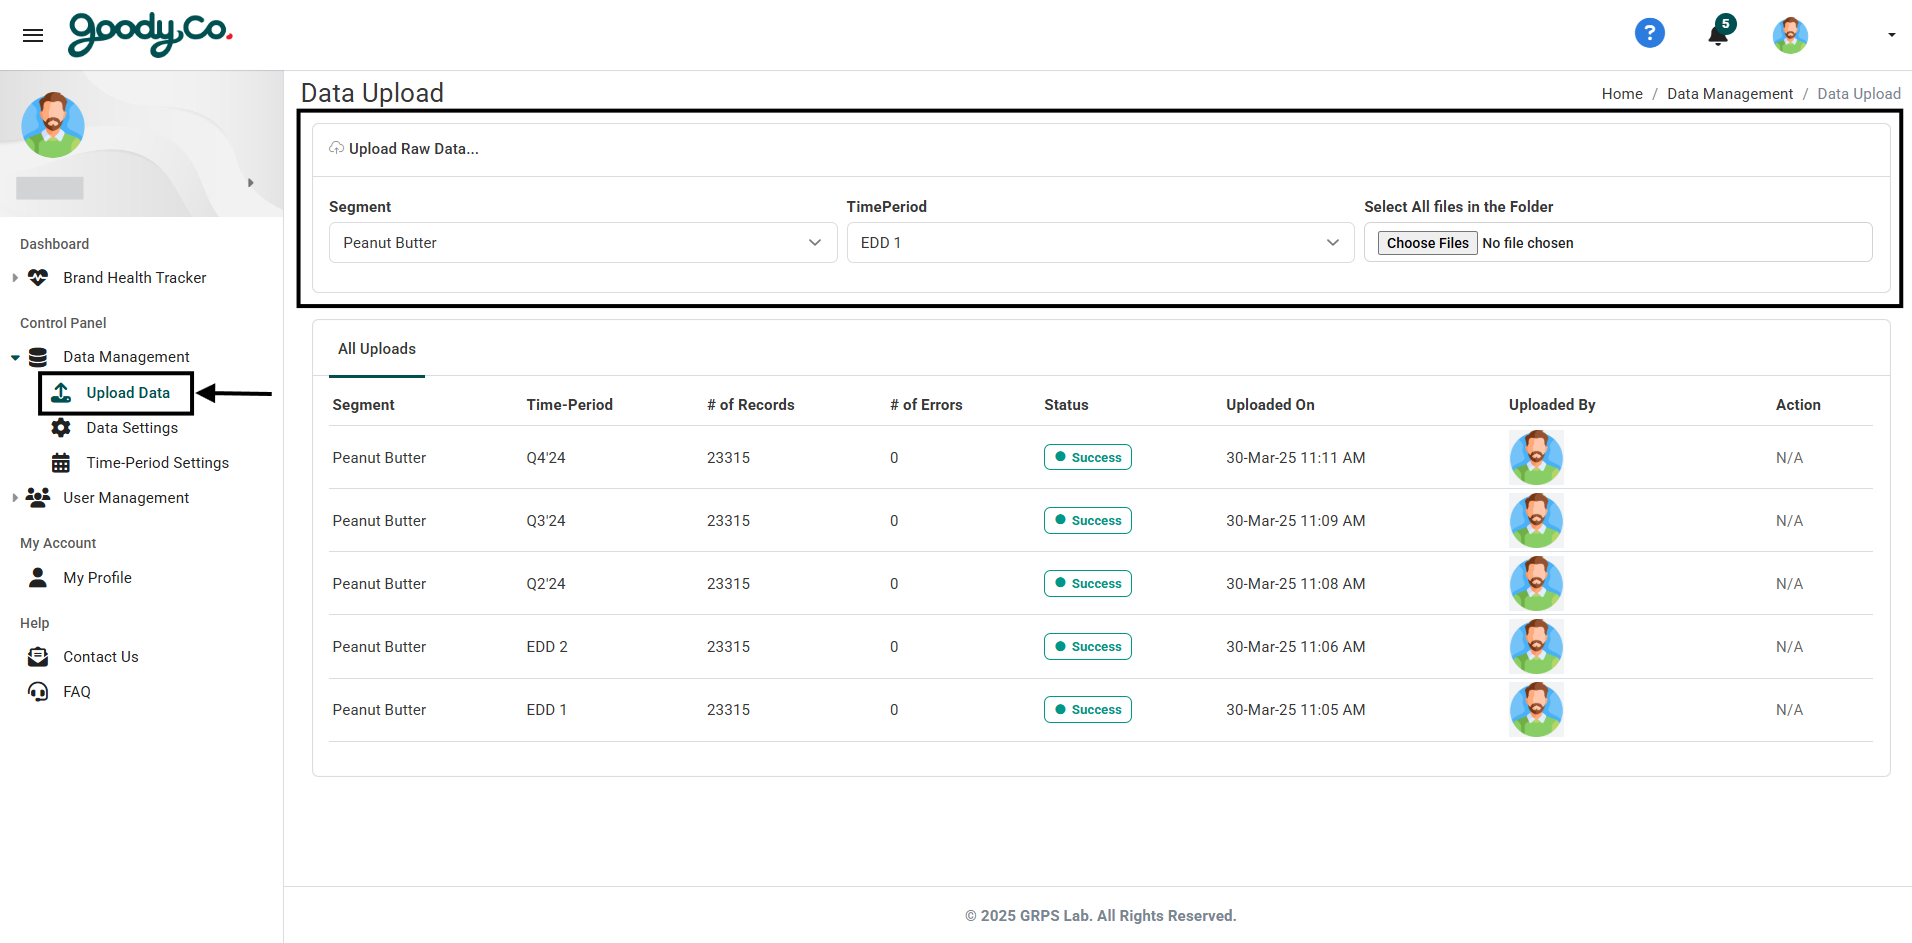
How do I upload new raw data to the portal?
To upload new raw data:
1. Navigate to the Data Management section in the dashboard.
2. Click on the "Upload Data" button.
3. Select the required fields (e.g., "Segment" and "TimePeriod").
4. Select the data files (ensure it is in the cleaned format).
5. Click "Upload File" to upload the data.
Note: Ensure all mandatory fields are completed before uploading.
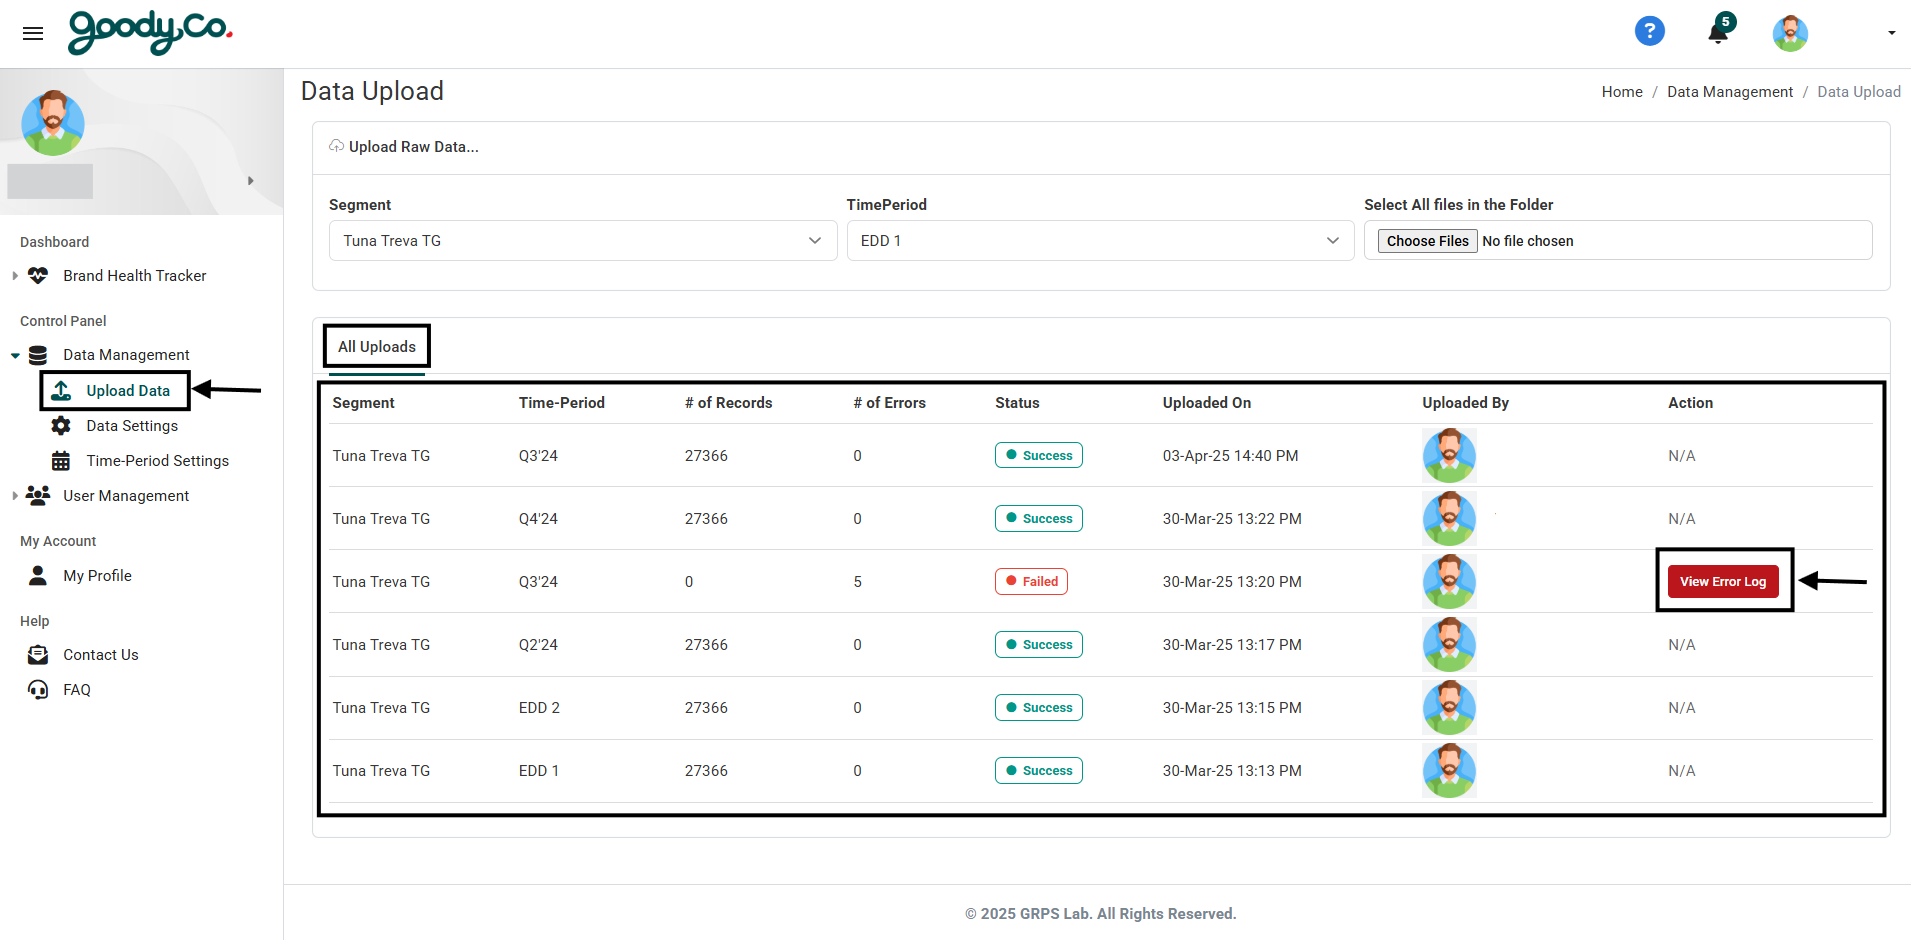
How do I navigate all the existing uploads?
To view existing uploads:
1. Go to the Data Management section.
2. Click on the "Upload Data" button.
3. The Data Upload page consists of the following sections:
- All Uploads: Displays all records of data uploads with relevant details.
Note: View the error log by clicking "Error Log" button.
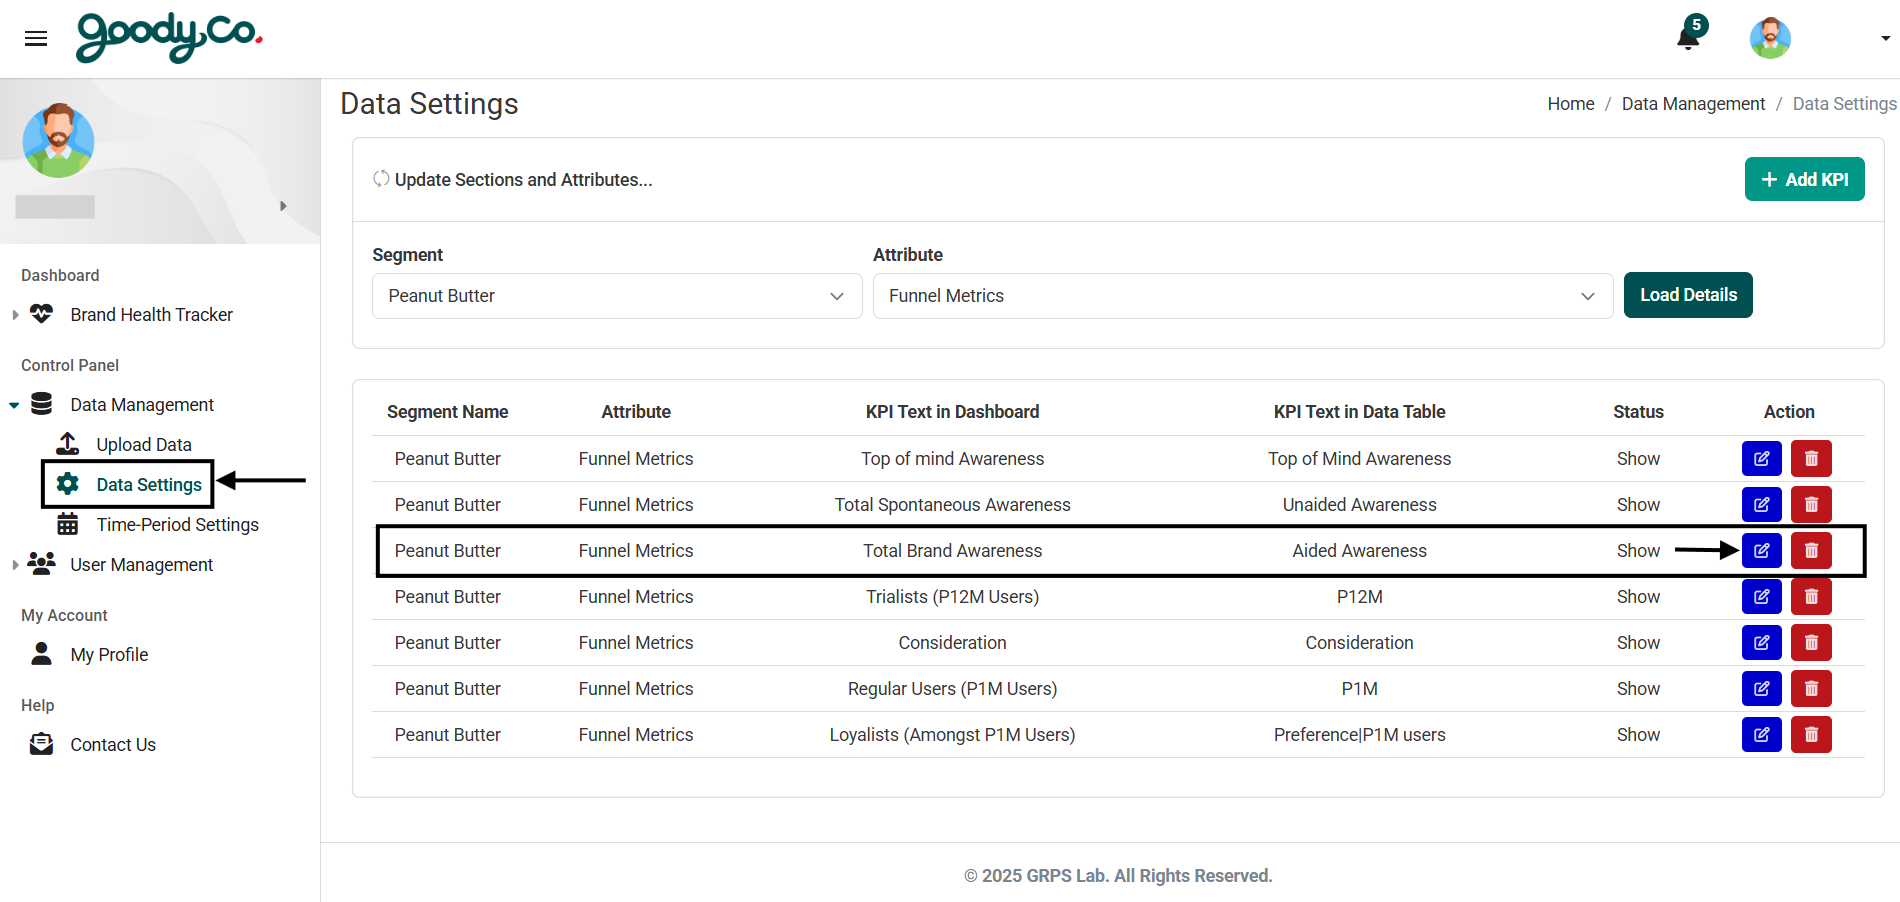
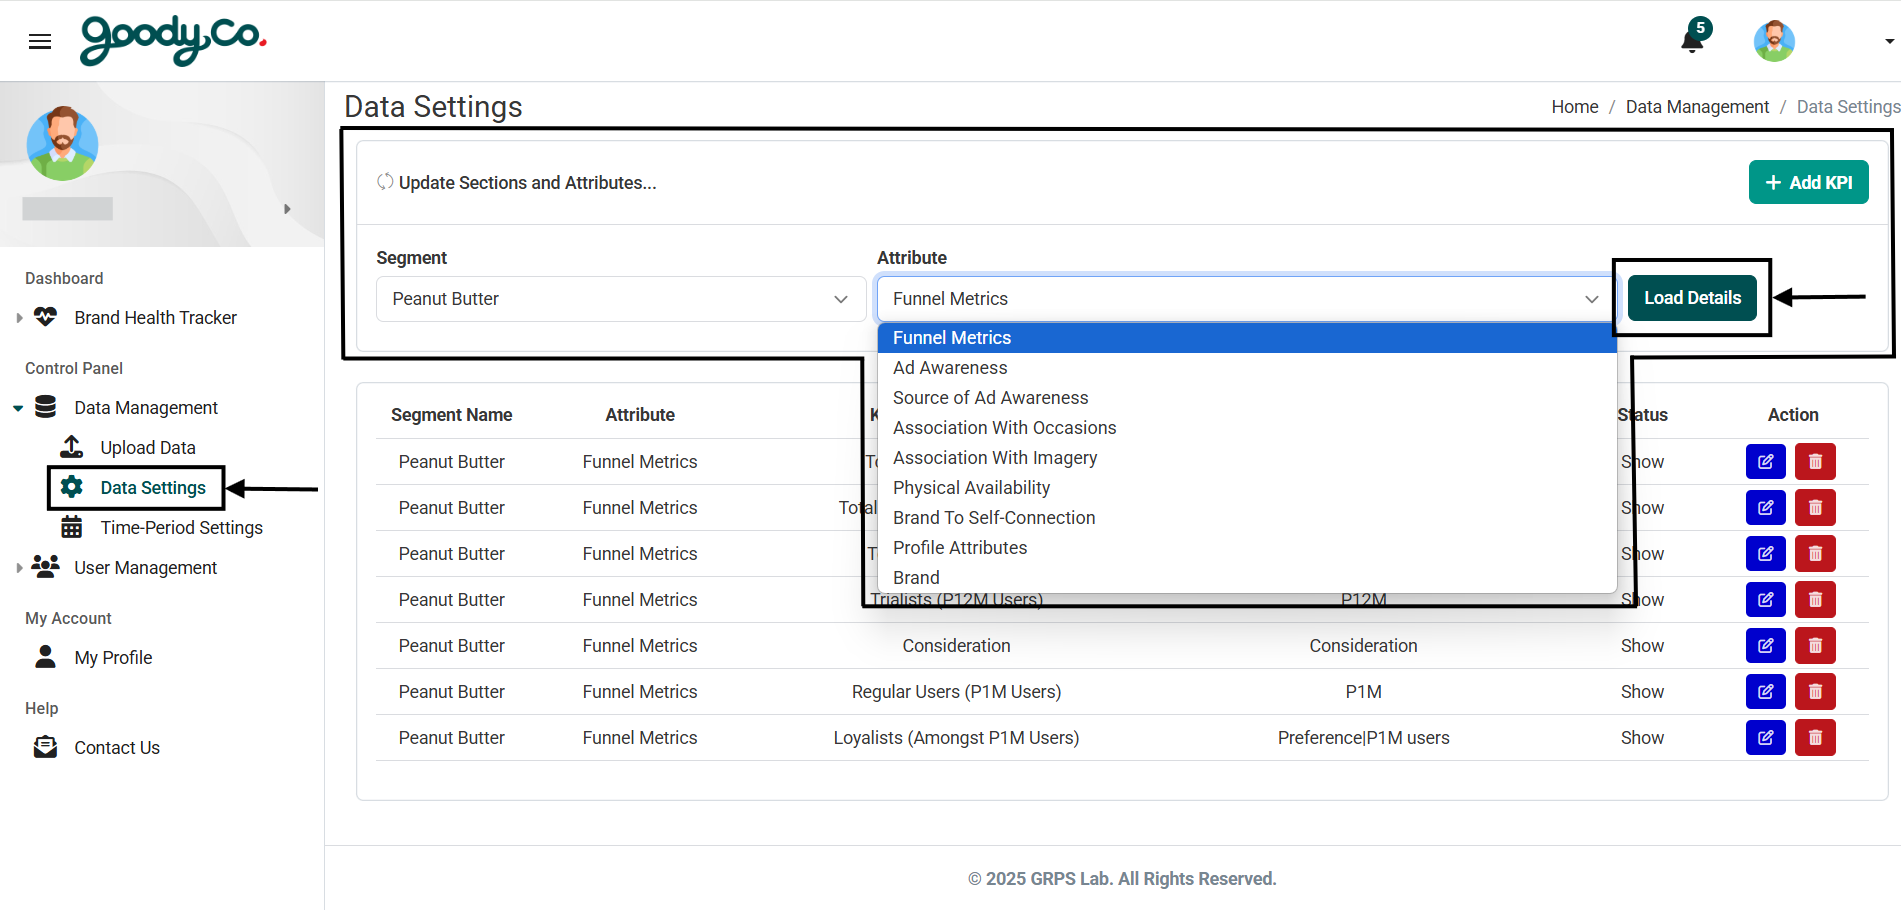
How do I navigate to all the existing Sections and Attributes details in the portal?
1. Go to the Control Panel section of the portal.
2. Click on Data Settings under the Data Management section.
3. Select the desired Segment and Attribute from the dropdown menus.
4. Click on the Load Details button.
5. You will now see a list of KPIs under the selected attribute, each with Edit and Delete options beside them.
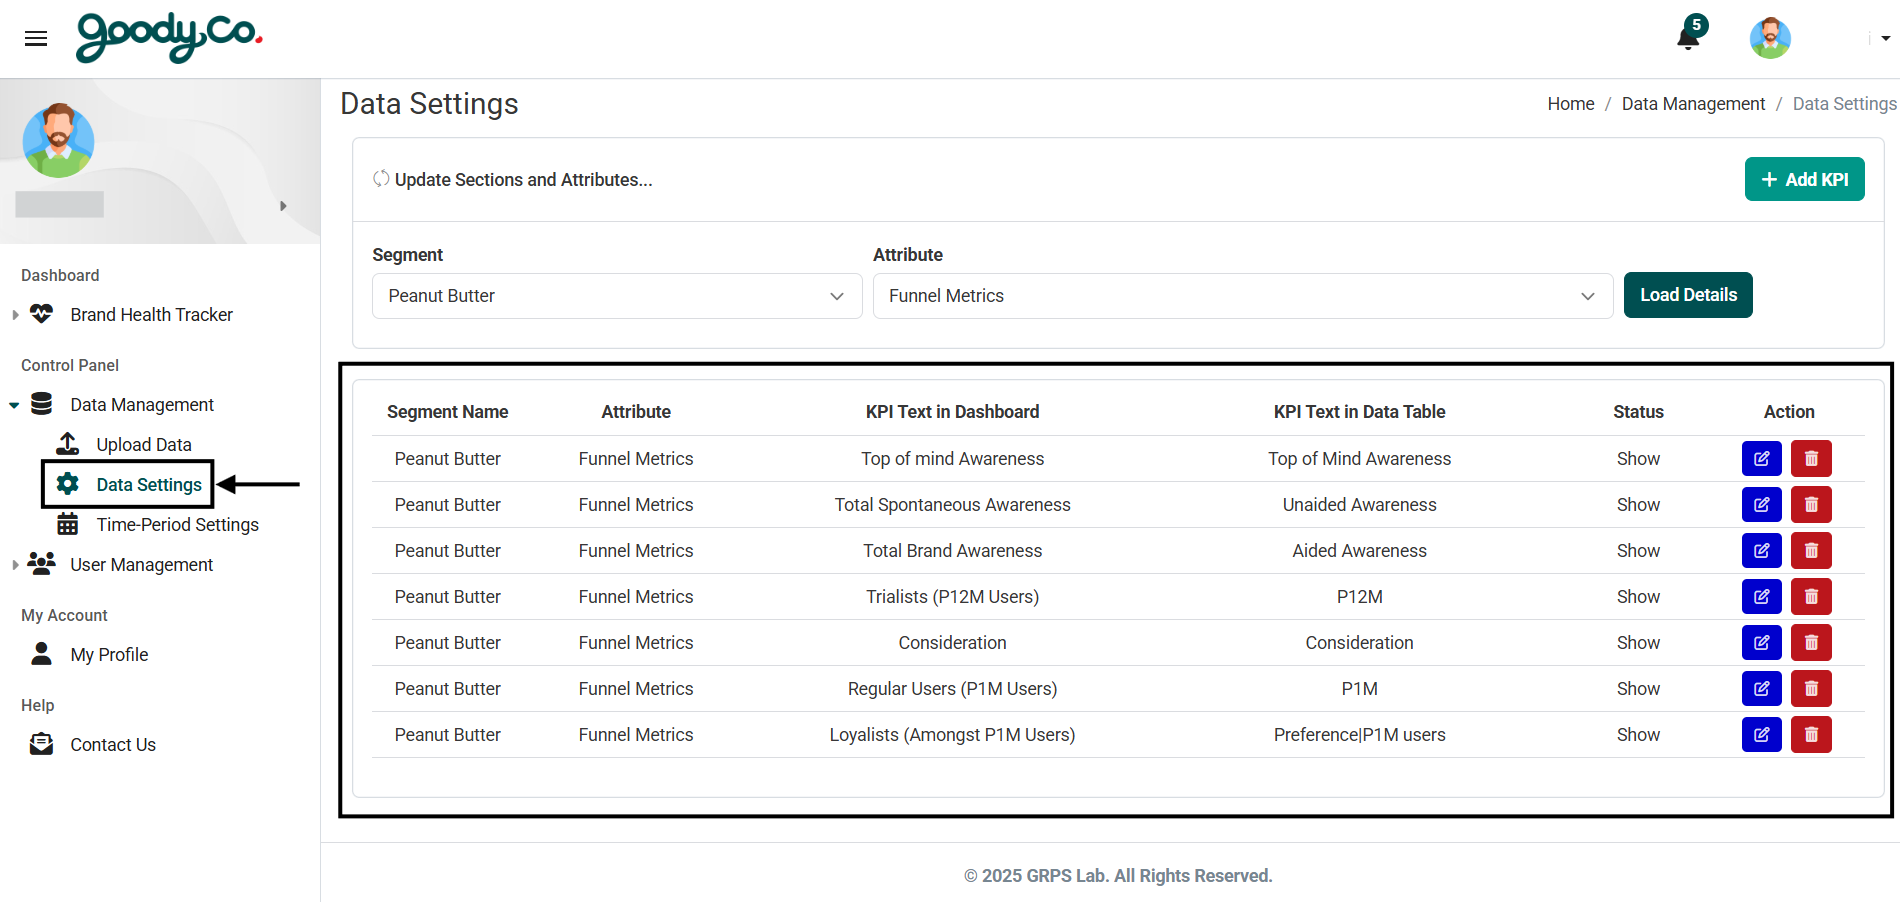
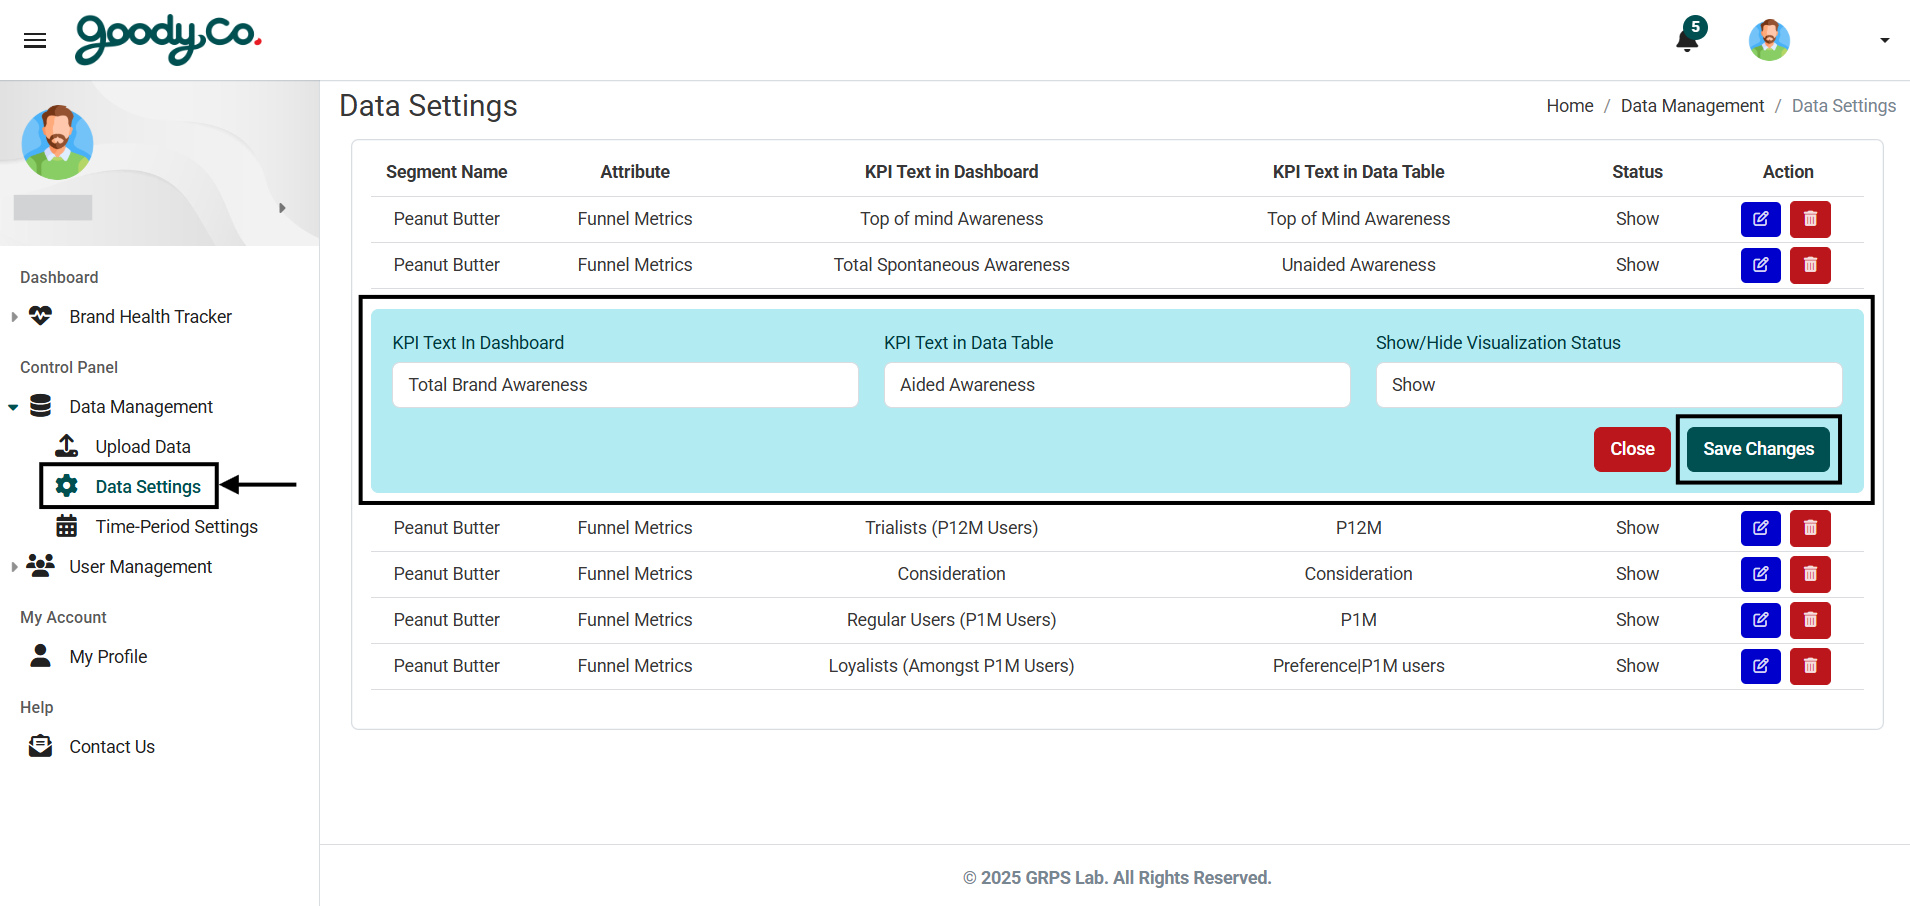
How can I edit the Sections and Attributes details in the portal?
1. Navigate to the Data Settings page under Data Management in the Control Panel.
2. Select a Segment and Attribute and click Load Details.
3. Find the KPI you want to update and click on the Edit button next to it.
4. A dropdown menu will appear where you can update fields such as:
- KPI text in Dashboard
- KPI text in Data Table
- Show/Hide Visualization Status
5. After making the necessary changes, click on Save Changes to update the KPI.